I made a simple tilemap generator based on the Map Generator made by TukanHan and the article.
Thanks to them!
Perlin Noise
So if you want to make a tilemap generator, I strongly recommend you to review TukanHan’s project and read the the article mentioned above. I’m going to write about some of confusions I had while creating the tilemap generator. I hope it will be helpful for you.
The first problem is what is Perlin Noise? TukanHan gave a class ImprovedNoise. That’s exactly the implementation of Perlin Noise in C#. But Unity has provided a function to generate perlin noise map, and that is Mathf.PerlinNoise2D. So the class ImprovedNoise is equal to Mathf.PerlinNoise. And thus, a generated perlin noise map is just an static 2d array, not dynamic.
If you want to observe a noise map, I recommend you to watch the first four videos made by Sebastian Lague. Yes, I’ve watched these videos in order to figure out what the perlin noise is, and finally I realised that a noise map is just a static 2d array, and perlin noise is just a kind of method to generate a noise map. So that step is not necessary to you.
But if you did, you’ll see that a basic noise map is too smooth. So we need to add more randomness to the noise map. Yes, all we have to do is to add a number of octaves to an empty 2d array, and an octave is actually a noise map. For example, the following code is used to generate an NxN map
1 | class Noise { |
Yeah, you may realise that I generated three octaves, but in the article, the author calculated all octaves in one loop. Generating an octave in a function can add more flexibility to the octave, for example, I can set different offset to different octaves or rotate some of them to make the noise map looks less like procedural generated, as stated in the article. So if you want more flexibility, I suggest you do that.
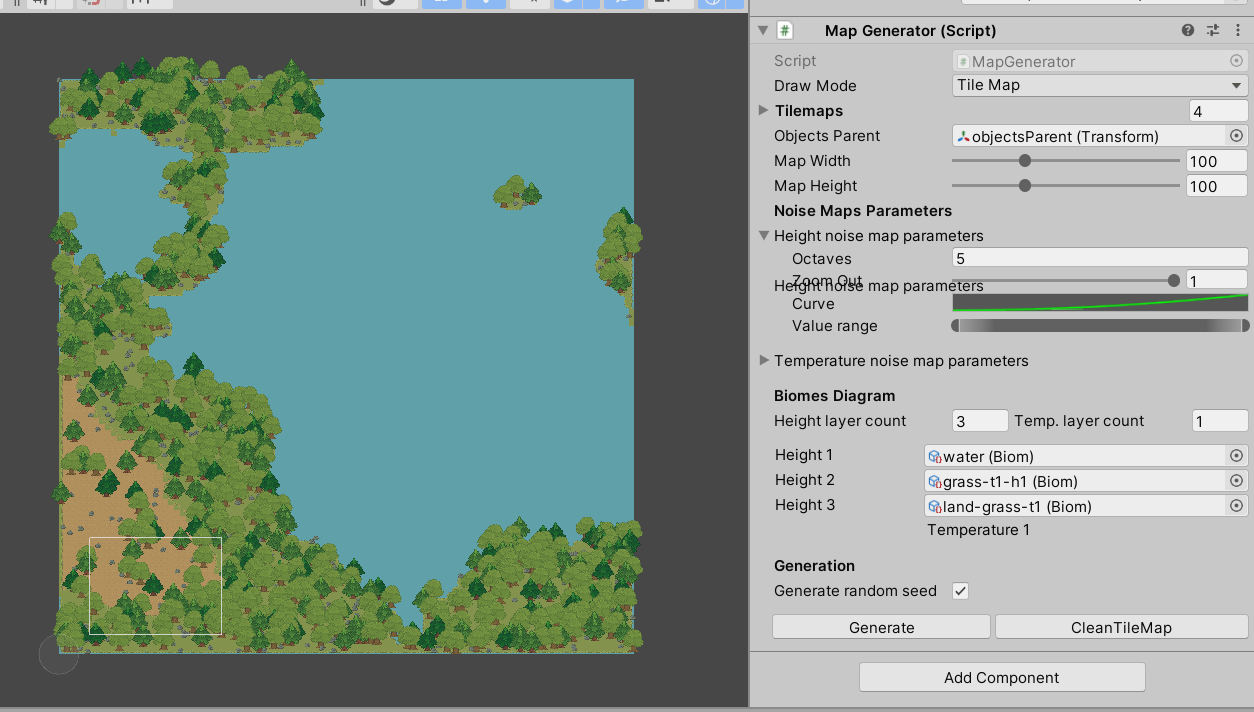
Some issues in TukanHan’s Map Generator
TukanHan provides several parameters to control map generation. But I have to say that he made some mistakes.
The first one is the targetValue in Noise Map Parameters. TukanHan wants to use this parameter to tweak the overall value in the final noise map, like, v = Mathf.Pow(v, targetValue). You may realise that it will not produce the expected result, i.e., If you set the targetValue to 0.3, you won’t get a noise map with most values around 0.3. I recommend you to tweak the overall value by an AnimationCurve. Yes, I learned this trick from Sebastian Lague’s videos I mentioned above.
The next issue is the order. TukanHan provides another parameter - the Value Range - for mapping values in the noise map to a range, and that’s the final step, which means that we will finally get a noise map with values between the Min Value and the Max Value. I think that the tweak by the targetValue should happen after the mapping, and the reason is that I found that the values in the noise map may be in a small range, for example, we might get a noise map with values between 0.653 and 0.765. If we tweak the values first and then mapping, the results may not be what we expected.
Rule Tile Maker
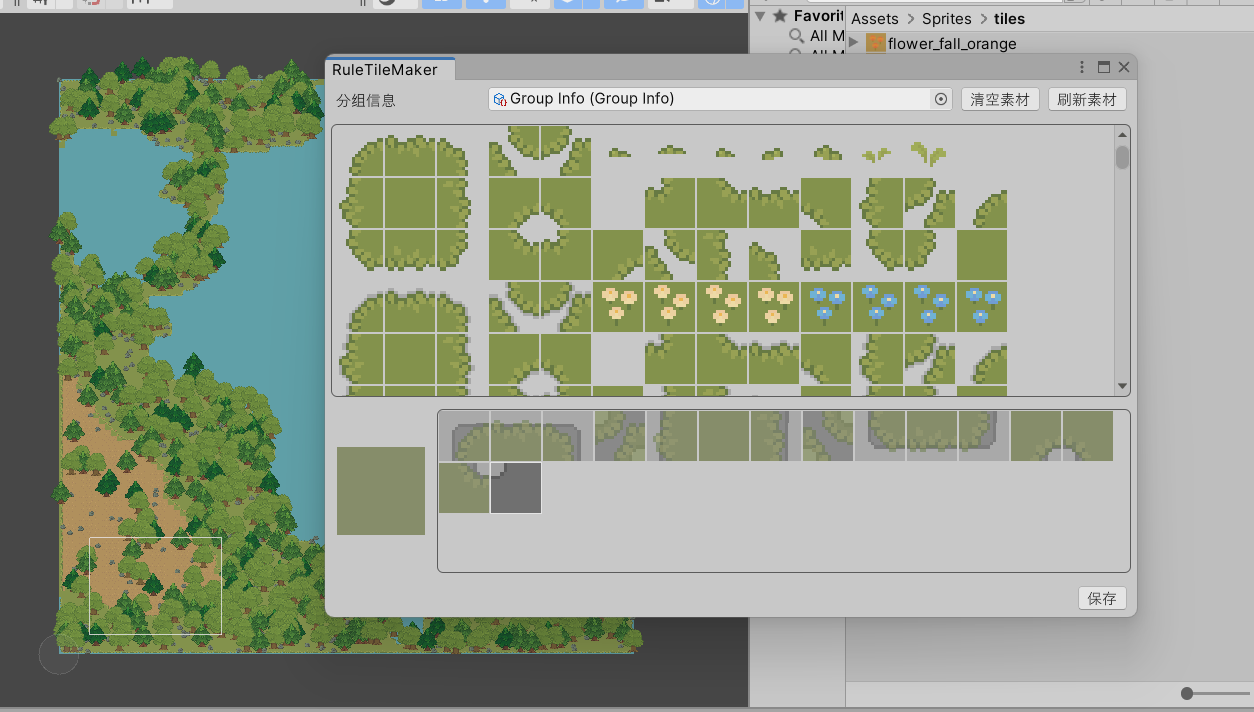
The last question is how to make tiles? The Rule tile is a powerful tool for drawing terrain in Unity, but we may use dozens of rule tiles and creating them one by one is just too much work! So I also made a tool based on the QuickRuleTileEditor to build rule tiles quickly, but I use the UI Toolkit to create the UI interface instead of drawing them via code, which makes everything much easier! Therefore, I strongly recommend you to create the tool’s UI interface directly using the UI Toolkit.